Webex Training
WebEx Training is a Purdue-supported virtual conferencing software. You can access the tool after signing into Webex. Webex Training supports all the standard Webex features, in addition to several more specialized configuration options for meetings and attendees.
Generally, Webex will be sufficient for most meeting needs. However, if you require the ability to customize breakout sessions prior to the meeting, Webex Training includes features that make that possible.
Notable Features:
- Screensharing
- Recording
- Download Optional
- Free for Purdue Faculty and Staff
- Meeting Security Features
- Live Chat
- Scheduled Meetings
- Breakout Sessions
- Advanced Scheduling Options
Quick Links
Getting Started
- To use WebEx Training for your course, start by accessing the Purdue WebEx portal here. All Purdue Faculty and Staff have access to Webex Training.
- After signing in, navigate to the menu. One of the options listed, after all the main features, will be "Webex Training".
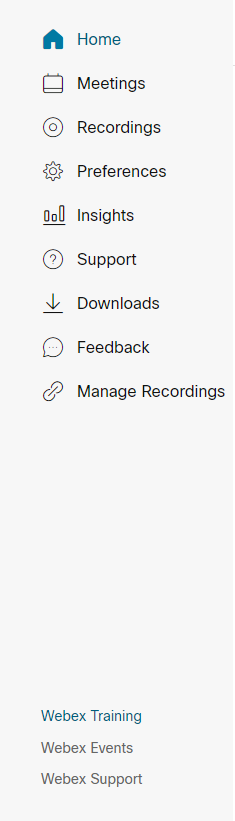
- After selecting "Webex Training", you will be taken to a new webpage for the tool. Here, a variety of new options will be listed in the menu.
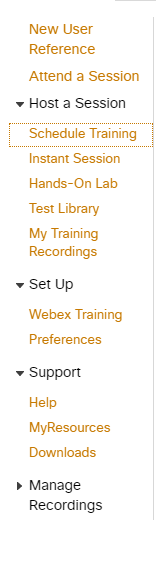
- The option for "New User Reference" links to the official Webex documentation. The remainder of this guide will cover setting up a meeting with breakout rooms.
Scheduling a Meeting
- To schedule a WebEx Training Meeting, first sign into WebEx and select "Webex Training" from the menu.
- Next, select "Schedule Training" from the menu.
- A new Training session will appear. Various settings will need to be configured before the meeting is ready to schedule. Start by setting the session name and password:
- Note: Ensure the box for "Send a copy of the attendee invitation to me" is checked. This will be very helpful when sending out the invitation to attendees!

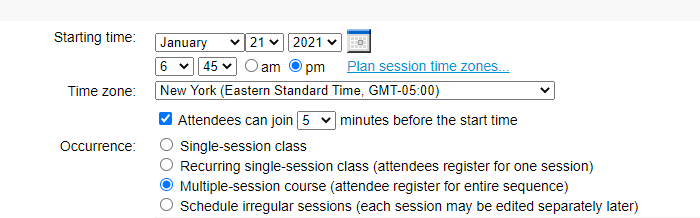
- The next section asks for the meeting schedule information. This can be configured to the specific requirements of your session or sessions.
- The occurrence options can customize the repetition of the meeting
- A single-session class only occurs once.
- A recurring single-session class refers to multiple sessions, each with distinct attendees. For example, a tutorial for students where they can attend one session, but not the others.
- A multiple-session course refers to multiple sessions, where attendees are expected to attend each meeting. For example, a regular class meeting.
- Irregular sessions will be distinct from one another and can be scheduled individually.
- The occurrence options can customize the repetition of the meeting
 For a multiple-session course, the recurrence specifications will need to be set:
- First, select whether the meeting will repeat daily, weekly, or monthly.
- Next, the day of the week can be chosen.
- Lastly, a specific end date or number of repetitions can be set.

- For this guide, we will not cover the "In-session Hands-on lab" section. It is only relevant in specific circumstances. The Webex documentation here can provide additional details.
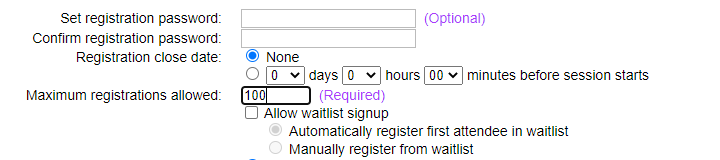
- In the "Registration" section, select "Require Attendee registration" and "Automatically approve all registration requests"
- We will "Require Attendee registration" to give us a list of attendees before the meeting begins. This will be helpful for pre-assigning breakout session teams.
- "Automatically approve all registration requests" will avoid the need to individually approve each attendee's registration. You can share the registration link with only the attendees to avoid unexpected registrations.

- Additional settings can be configured for registration as well. Setting a maximum number of registrations is required.
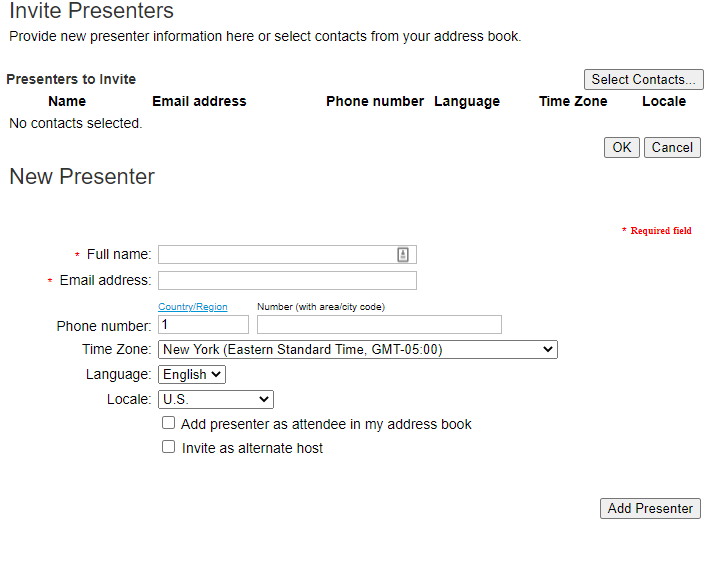
- Managing attendee invitations within the meeting scheduler requires adding each attendee individually. Instead, leave this section blank for now. After creating the meeting, you'll receive a copy of the invitation that can be sent directly to attendees.
- If the meeting requires multiple hosts, you can add them from either the Attendees or Presenters menu. You can select the box labeled "Invite as alternate host".
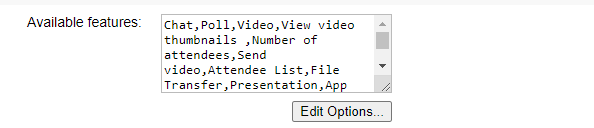
- The "Session Options" section can be configured if you'd like to modify the features available during the meeting:
- Next, the "Breakout Session Assignments Setting" will let us allocate attendees to specific breakout sessions. Check both "Enable Pre-Session Assignment" and "Manually assign registered attendees to breakout sessions" to do this.
 In the remaining sections, you can choose to add an agenda, meeting description, or associated files. They can be left blank for most meetings. Selecting "Schedule" will save the meeting.
 - You will receive two emails. One will confirm the meeting you scheduled, the other will be a copy of the attendee invitation. You can forward the attendee invitation to any individuals who may be attending.
Assign Attendees to Breakout Rooms
- After a meeting is scheduled and attendees begin to register, you can create breakout rooms and assign specific attendees to each room.
- For this guide, we will begin from the "Session Information Page". You can access this page immediately after scheduling a meeting, from the "Host Information" link in the schedule confirmation email, or by clicking the meeting in the list of upcoming meetings on the main Webex page.
- While on the "Session Information Page", you will be able to select one of several meeting options. Select the "Manage Registrations" option.

- The next page includes various ways to manage attendees. You may view the list of everyone who has registered, in addition to those who have been approved (typically, everyone) and those who have been rejected. You may choose to reject those who have been approved or approve someone who was rejected on the respective list.

- Another option on this page is "Pre-assign attendees to Breakout Sessions...". Select that one to continue.
- A new window will appear with the breakout sessions interface.
- All of the attendees who have not been assigned yet will appear in the box on the left.
- The current breakout sessions are listed on the right.
- You can add additional breakout sessions by selecting "Add breakout session".
- You can rename breakout sessions using the labeled text boxes.
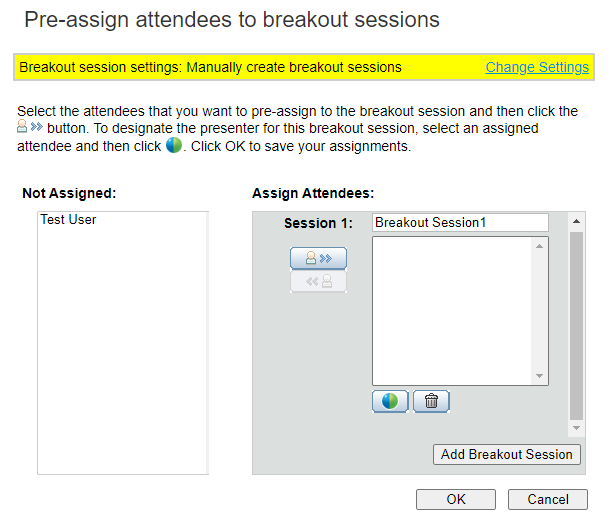
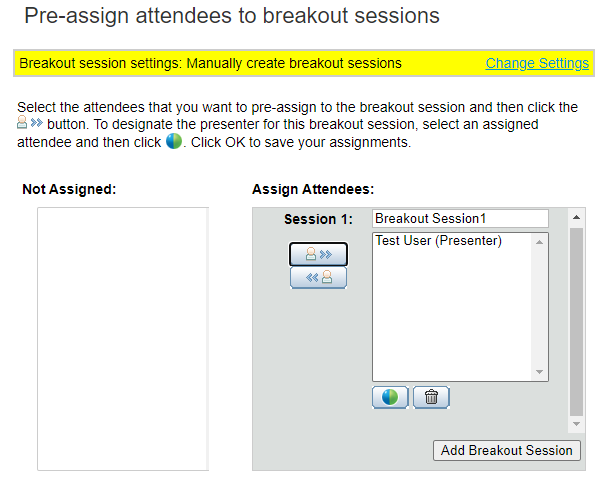
- To move an attendee into a specific session, select their name and use the "Move User" button for that breakout session.
- When you are finished, select "OK" to save your work and exit or "Cancel" to quit without saving.
Starting a Meeting
- When you are ready to start a meeting, you can do so from the meeting link or from the Meetings page in Webex. You may be prompted to use the browser version or download a local client. This guide will assume that you are using the local client.
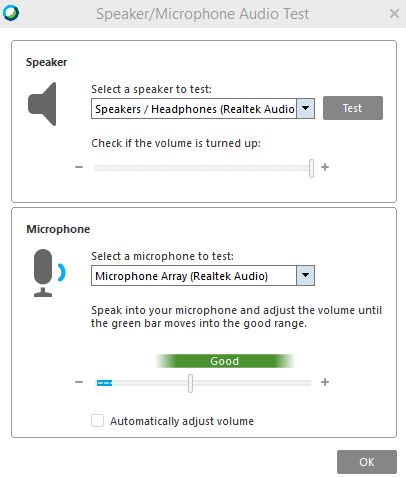
- After starting the meeting, you will be prompted to verify your speaker and microphone settings.
-
You may also choose to enable your camera and/or mute your microphone using the interface buttons near your name in the participant’s panel.
-
The menu options listed at the top of the application grant you control over various settings. A few key options are listed below:
-
Share -> My Desktop
-
Share -> Application (to share a specific application)
- This is recommended to minimize the risk of notifications / unintended sharing.
- Participant -> Mute on Entry
- Session -> Start Recording (for recorded meetings)
- Session -> Session Options
- Breakout -> Open Breakout Session Panel
- Breakout -> Start Breakout Sessions
- Breakout -> Breakout Session Assignment
-
![]()
- The participant's panel will list all of the participants in the meeting, separated into presenters and attendees.
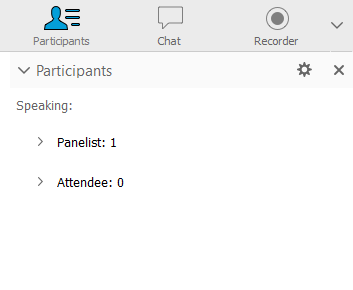
- The other panel options can be enabled to display the chat window and recorder options as well.