Webex
What is Webex?
WebEx is a Purdue-supported virtual conferencing software. You can access your personal account here.
Notable Features:
- Screensharing
- Recording
- Download Optional
- Free for Purdue Faculty, Staff, and Students
- Meeting Security Features
- Live Chat
- Scheduled Meetings
Quick Links
Getting Started
- To use WebEx for your course, start by accessing the Purdue WebEx portal here. All Purdue Faculty, Staff, and Students have a WebEx account.
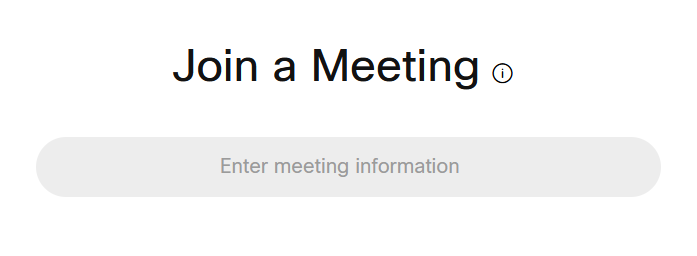
- Your first view will be a "Join Meeting" page. Without signing in, you can join any meeting using the designated meeting number or room ID.
- Next, log into your account using the log in button. You will find it in the top right corner of the page.
- After logging in, the homepage will now greet you with your name and allow you to start meetings. Note: This is the page you will see by default if you were already logged in.

Scheduling a Meeting
- To schedule a WebEx Meeting, first sign into WebEx and select the "Schedule a meeting" button on the homepage.
- You will need to give the meeting a name and password. The date and time will default to the current time, but can be adjusted as necessary. Meeting duration can range from 15 minutes to 24 hours.
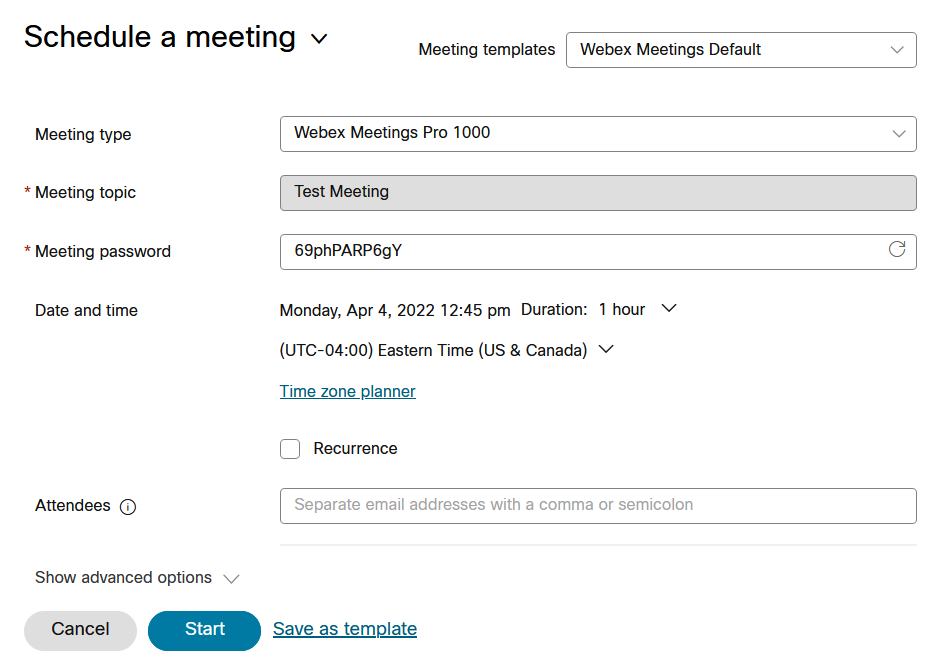
- If you already have a list of individuals to invite, you can enter their emails as a comma-separated list in the Attendees field. This is optional. A shareable meeting link will be generated in the next step.
- If the meeting is set to begin immediately, you can use the "Start" to proceed. If it will take place at some future time, the "Schedule Meeting" button will appear instead. You can also choose to save it as a template if you are not ready to schedule the meeting yet.
- If the meeting starts immediately, you will be taken to the "Start Meeting" navigation page. If the meeting is scheduled for a future time, the next page will provide information about the meeting. From there, you can view the Meeting Link and password.
- Scheduled meetings will appear on your Outlook calendar automatically.
Starting a Meeting
Instant Meetings
- To start an instant meeting, log into Webex and select the "Start Meeting" button. This will start a meeting in your personal Webex meeting room. With the dropdown arrow, you can choose to start the meeting with the desktop app or with the browser.
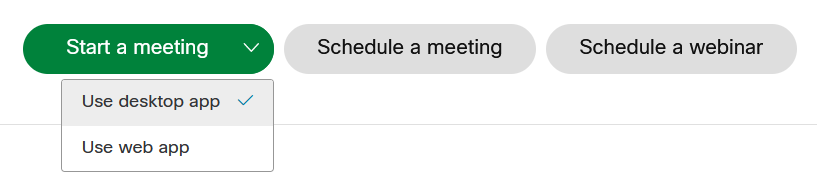
- If you haven't installed the desktop application, you will receive a prompt to do so. You can choose to do so or host the meetings in your browser.
Scheduled Meetings
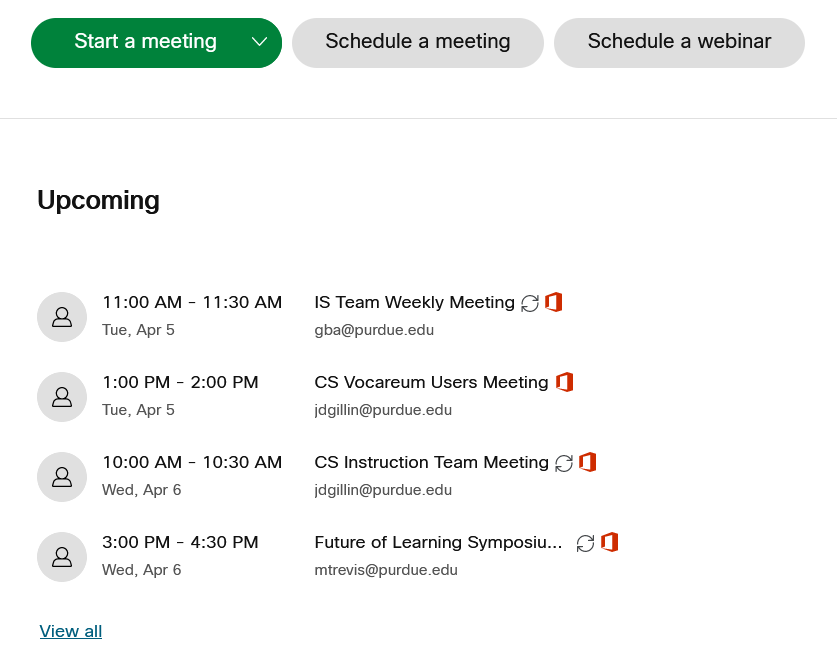
- To access a list of scheduled meetings from the web interface, log into Webex. Upcoming meetings appear on the homepage and in the "Calendar" tab in the sidebar.
Hosting a Meeting
- After starting a meeting, you will launch the Webex application locally or in your browser. The versions are very similar to each other.
- A pop up will prompt you to select your audio and video connection settings. Typically, the default system settings will suffice. Audio will default to using the computer, and video will default to the system camera.

- The icons along the bottom of the screen are meeting controls. In the order of left to right, they are as follows:
- Audio and Video Controls - Customize Audio and Video Connection Settings.
- Share Content - Share a window, application, file, or editable whiteboard.
- Recorder - Record meeting.
- Raise Hand/Reactions - Raise your hand to ask to speak, and send temporary emoji reactions.
- More Options - Options such as locking the meeting to prevent new users from joining. When using a smaller application window, other options in this list will be stored here.
- End Meeting - End the meeting for all participants.
- Apps (Desktop) - Menu for apps that can integrate with Webex.
- Participants - View a list of the current participants.
- Chat - Send text messages to all participants or specific individuals.
- Panel Options - Open panels for Q&A or Polling

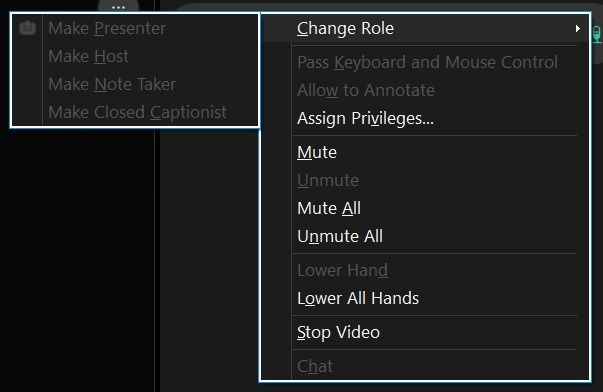
- After an participant joins the meeting, you can choose to change their access level or remove them from the meeting. To do so, right click on the user in the participant list and select the appropriate option. "Change Role To" will change the role, and "Expel" will remove the participant from the meeting. Note: Making an participant the host will remove your host access.
Tips
- Keep meetings locked. When participants want to join, they will be moved to the "Lobby" to wait until you admit them. This will help avoid any unexpected guests.
- Mute on entry. Ensure participants are muted when they join to minimize disruptions.
- Avoid posting meeting links in public spaces. Instead, post them within a course forum or Brightspace.
Last Updated: Jul 11, 2025 2:14 PM