
Project 6: Android Alarm System
Assigned: Wednesday, April 20, 2011
Due: Friday, April 29, 2011 @ 11:59 pm
You must find a partner from CS 180 and jointly work on this project. Only one of you will need to turn in the project. Make sure that the names of all teams members are on the header comments of program files.
Objective
Now you have familiarized yourself with some Android programming. The objective of this project is to provide further experience with the concurrency and File I/O associate with the Android programming. You should be familiar with all the material from the lectures, recitations, and book readings up to this point, especially all the Android labs.
Setup
Before you begin you need to create a folder called project6 in your CS180 folder to hold your .java files for this:
>> pwd
/home/yourlogin/CS180
>> mkdir project6
>> cd project6
>> /homes/jfrankl/emulator
After you run this command, the Android emulator will get started. If you get an error (look for the word NAND), then you need to reboot the machine (log out, look for actions/restart on the login screen). If connecting to the lab remotely, try a different machine.
>> /homes/jfrankl/pal
After running this command, the folder will contain two files: AlarmWriter.java and DialogGUI.java. One partner should complete one class, the other should complete the other class. You will probably want additional methods and classes, although you should limit the interaction between the GUI and IO sections to those shown (or else we will not be able to give you credit for your portion if your partner's portion and yours don't work well together).
Overview
For this project, you will be developing an alarm system for the Android phone. You will be responsible for constructing the layout of setting up certain events associated with each user interaction. You also need to design an alarm class to represent each alarm. Each alarm should be its own thread in order to keep track its time individually. After creating each alarm you should store it into a file.
We have implemented the main window and list of alarms (this turned out to use some Android-specific details that we didn't want you to have to deal with.) In order for us to read the list of alarms, you need to place them in a file - we will read this file to get the list of alarms. For the GUI part you need to implement dialog boxes that pop up and get information to set an alarm and call methods provided by the AlarmWriter to set the alarm and also save it in a file. Your IO must have a getFileName
method that returns the name of the file that currently holds the list of alarms - remember that you should close the file after you have written an alarm, as we will call your getFileName and open and read the entire file every time we redisplay the list.
One team member is responsible for the GUI portion, the other is responsible for the IO portion. Make sure work is evenly divided between team members. Here is the API of classes and interfaces you need for this project.
Project Description
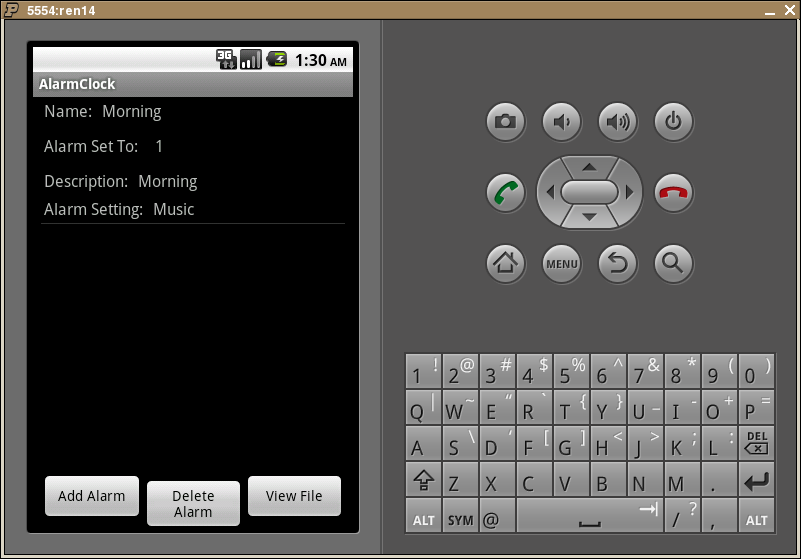
Here is a picture of the alarm system you will be creating after user clicking the add Alarm button:
Name: the alarm name.
What time is your alarm: the relative time after you create that alarm the alarm will ring.
Description: description of the alarm.
The above picture gave you an example what you should put into these text fields.
Each alarm is running in its own thread. You need to assign a unique id for each alarm and you should save all alarm information into a file after adding an alarm. The pattern of the information you need to store is: time,name,description,alarm_setting (you may need to use the value of MUSIC_ALARM, SILENT_ALARM, and PIN_ALARM constants) and id. Make sure use comma to separate each value.
The alarm can be set in three modes:
Music mode (the default, plays music), Silent(Dismiss) mode (brings up a dialog box) and the PIN mode (brings up a dialog box where you need to enter a number, to show you are really awake.).
If user chooses Music mode or does not choose anything, after the time set for that alarm the Sound should play.
Note that you will need the Main.showScreen(int screen) method to cause the display. The screen corresponds to a constant (PIN or SILENT) from the AlarmData interface. After adding an alarm your phone should look like this:
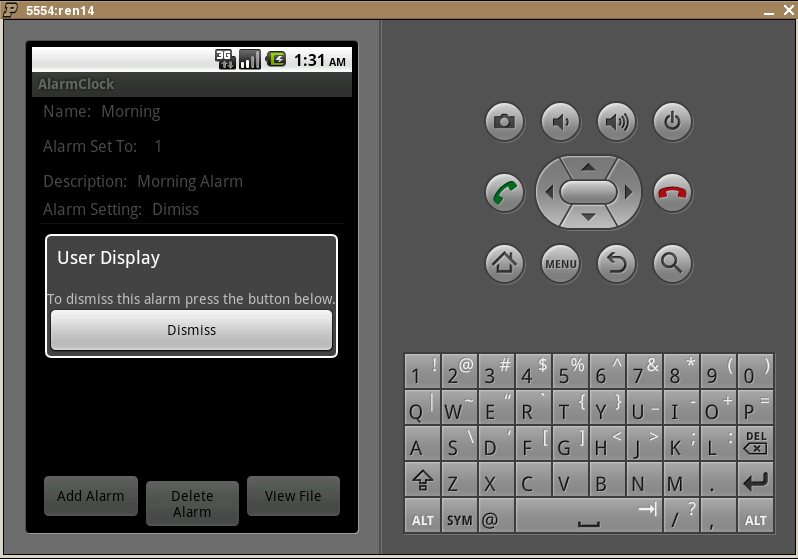
If user chooses Dismiss, after the time set for that alarm, the dismiss panel should pop up like the following:
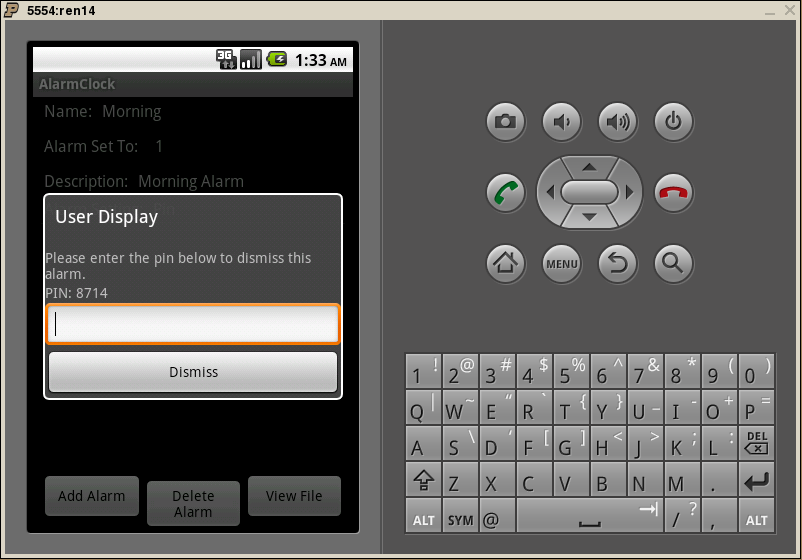
If user chooses Pin, after the time set for that alarm, the follow panel should show up. You need to generate a random number for user to enter. The Alarm will only be dismissed if the user enters the correct number (to ensure the user is awake.) (You can use Math.random method to generate random numbers).
After the alarm buzzes, dismisses or the pin panel shows up you need to delete that alarm from the file by using the alarm's unique id.
Help you test
Below are a list of buttons and suggestions to help you test your code:
View File button: use to test your saveAlarm method. When you click this button all alarm information stored in the file will be shown on the screen.Store and delete in the file
When you store information to the file you first need to read everything that has already stored in the file; append the new alarm information and write them back.
You need to use FileHandler for your FileInputStream and FileOutputStream.
Similarly when you delete some alarm information on the file, you need to read everything that has already stored in the file delete the alarm information you need to delete and write everything back the file.
Project Submission
Once you have completed your project, you should turn in all of your files using the turnin command (even those provided that you did not change, we won't know who changed them and who didn't).
change your current folder to your CS180 folder and run the turnin command:
>> cd ..
>> turnin -v -c cs180=<your recitation section> -p project6 project6
If you are having trouble submitting your files, talk to your TA for help.
Grading Rubric
Grading of this project will roughly follow the guideline below . It is subject to change depending on how we regard different aspects of the project, however, it will not change significantly.
5: coding standards (nomenclature, comments, headers, etc.)
5: program compiles
IO points: