CS180 Spring 2011
Project 4: CS180 Burgers 'R Us Revisited
Assigned : Tue March 22nd, 2011
Due : 11:59pm Fri April 1st, 2011
1. Objectives
In this project, you would learn how to:
- Implement a Linked-list data structure.
- Apply Generics programming.
- Apply Inheritance by either extends an abstract class or implements an interface.
2. Setup
- Login with your UNIX account. Then create a directory named project4
under your cs180 directory. To do that, issue the following
commands in the terminal:
>> pwd
/home/yourlogin/cs180
>> mkdir project4
>> cd project4
- Download file project4.jar and the skeleton code Project4.java and save it into project4 folder.
- Goto Dr Java Menu, Edit -> Preferences -> Resource Location (First option under Categories) -> Extra Class Path -> Click Add. Select the project4.jar file in the menu and Apply.
3. Project Description
In Project 3, you have developed a program which simulates the process of placing orders and cooking orders at CS180 Burgers 'R Us restaurant. However, after using the program a while, the owner of the restaurant wants you to modify the program to meet his additional demands described in the following:
- Since many times the number of orders exceeds the maximum number of orders the kitchen can handle (i.e N in Project 3), the program should have dynamic data structures to keep all orders instead of a fixed-size array-based data structure as in Project 3. This way helps the program to be scalable and more efficient.
- The restaurant wants to extend its services by offering two different types of order: dine-in order and delivered order. For delivered order, the customer needs to tell how far his home away from the restaurant. For dine-in order, the customer needs to tell how many seats he wants.
- The restaurant only accepts to deliver within a maximum distance, called maxDist. Also, when the restaurant is full, assuming the maximum number of seats in the restaurant is maxSeats, then it would not be able to accept any further dine-in orders.
- There are several chefs in the kitchen. Recall that a chef could be a QueueChef, StackChef or ValueChef. Each chef is evaluated based on his/her creditValue which is the accumulated value of the order he/she has cooked so far. The owner wants the program to display a sorted list of chefs in creditValue accending order and the chef at the top of the list should be the one who cook the next order.
4. Steps to Solve the Problem
In this section, we will help you to develop your code incrementally and make use of the classes and methods we have provided to build your program.
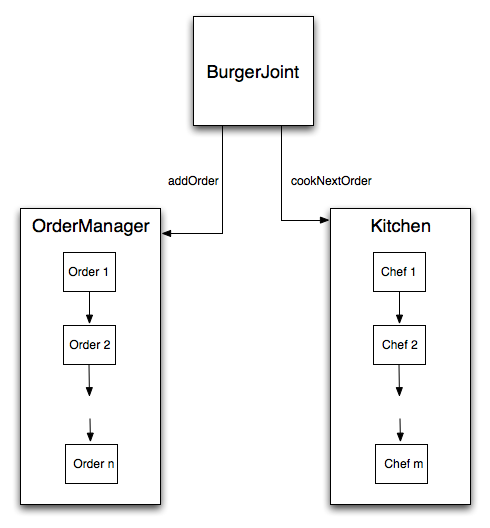
Step 0: The big picture
Imagine that the program you are going to implement composes of three main components: BurgerJoint, OrderManager and Kitchen. Now, suppose that you want to order your lunch from CS180 Burgers 'R Us. The following procedure will be processed in order to serve your order:- The BurgerJoint gives you three options to go: take out, dine in or ask the restaurant to deliver your food to your place. Once the BurgerJoint gets your order, it will ask the OrderManager whether the restaurant can accept the order. Obviously, if you order to take-out, your order will be served when it comes to your turn. However, if you want to dine in, since the restaurant only has a limited number of seats, then sometimes it's full and your order is not qualified. Similarly, for delivered order option, if your place is farther than a number of miles away from the restaurant, the restaurant also can not accept your order.
- Assume now your order has been accepted and it is put at the end of the list of orders managed by the OrderManager. The Kitchen, on the other hand, has a number of chefs in charge of cooking. Again, these chefs would belong to one of the three possible types of chefs we have learnt in Project 3: QueueChef, StackChef and ValueChef. The question is how the Kitchen could mantain these chefs? Simply speaking, the Kitchen puts these chefs into a list of chefs ordered by their creditValue. The chef at the head of the list is corresponding the one whose creditValue is smallest (in case two chefs have the same creditValue, the one who has stay in the list longer will near the head of the list). So now, when an order needs to be cooked, the head-chef will be in charged of cooking for this order. And since at that time, his creditValue has increased, his position in the list may change as well.
Step 1: Implement Generic LinkedList
As you can see in Step 0, the restaurant wants to maintain two lists, one list for orders, the other list for chefs. To do so, you are asked to implement a generic linked-list so that it can be re-use in both cases. To help you on doing this step, we have provided a generic interface called ILinkedList. What you have to do is described in the following:- Implement a generic class called LinkedNode<E> which represents a node in a linked-list. We have let you decide on how particularly the class should be implemented. Basically, it should contain a data item of type E and linked to the next node in the list. Note that you should use private keyword to define a class attribute if this attribute should not be explicitly public to the outside world.
- Implement a generic class called LinkedList<E> which represents a linked-list. This class has to implement the interface ILinkedList. Basically, it only needs to keep track of the head of the list.
Step 2: Extend Order class
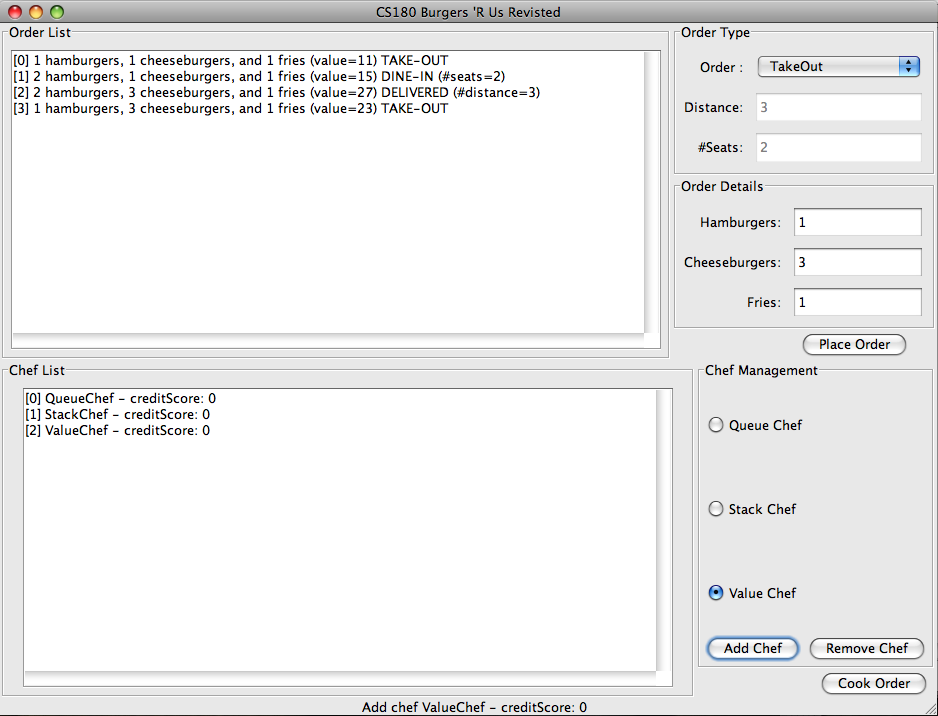
Since the restaurant has extended its service by offering three different types of orders with different purposes, you are asked to extend the class Order with the following classes:- Implement a take-out order class called TakeOutOrder. You are free to implement this class in your own way, however, be sure that you need to extend the toString() method from Order to have correct description of a take-out order (see the images at the end for more details).
- Implement a dine-in order class called DineInOrder. You are free to implement this class in your own way, however, be sure that a dine-in order has to specify the number of seats it takes.
- Implement a delivered order class called DeliveredOrder. You are free to implement this class in your own way, however, be sure that a delivered order has to specify the the distance from the restaurant.
Step 3: Implement OrderManager class
OrderManager is sure one of the main component of this program. You are asked to create a class called OrderManager which extends the abstract class OrderList. You can look at the API of OrderList for more details, however, we want to emphasize the following points:- OrderManager needs to maintain a linked-list of orders. This is the place where you should use your LinkedList class implemented in the previous step.
- void addOrder(Order order, int orderType, int dist, int seats): this method is called by the BurgerJoint to try to add an order into the order list. However, the OrderManager needs to make sure whether the order could be accepted or not before any further action taking place. In case the order could not be accepted, this method needs to throw an UnAcceptanceOrderException exception.
- getMaxDist() and getMaxSeats() return the value of maxDist and maxSeats described in Project Description.
Step 4: Implement Kitchen class
In the step, you are asked to create a class called Kitchen to implement the interface IKitchen. You can look at the API of IKitchen for more details, however, we want to emphasize the following points:- Kitchen needs to maintain a linked-list of chefs. You don't have to implement any chef here. Actually, we provide all chefs you need. More specifically, you can reference their API here: Chef, StackChef, QueueChef, ValueChef
- Chef getCurrentChef(): this method returns the chef in charge of cooking the next order.
Step 5: Error Handling
Be careful when you handle errors, especially the following errors:- OrderList.NoOrderException: throw this exception when there is no order to cook
- OrderList.UnAcceptanceOrderException: throw this exception when the order could not be accepted
- IKitchen.NoChefException: throw this exception when there is no chef to cook
5. Puting all together
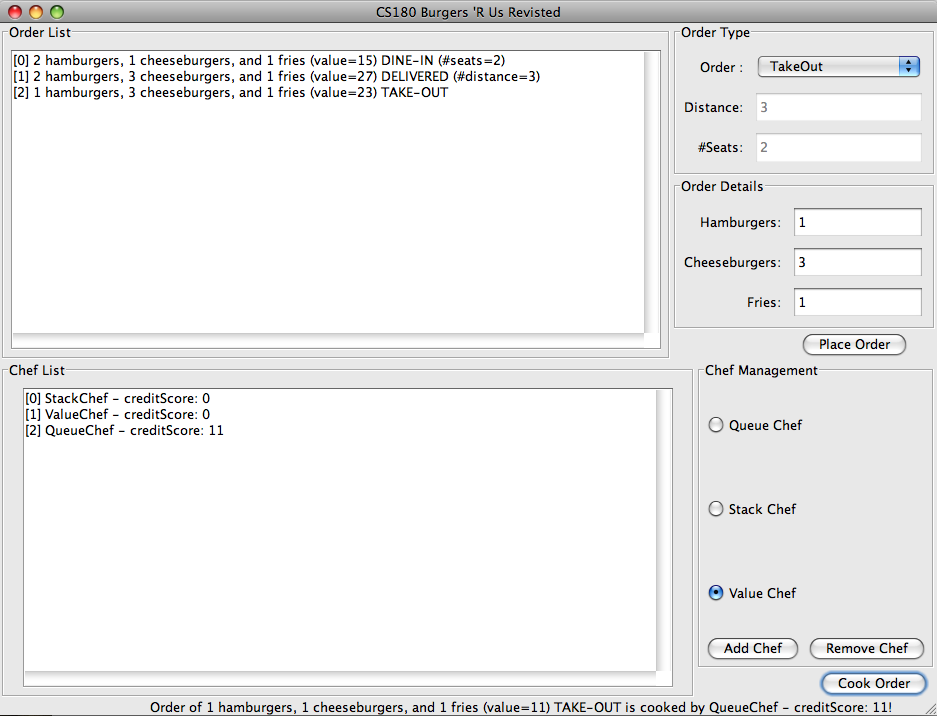
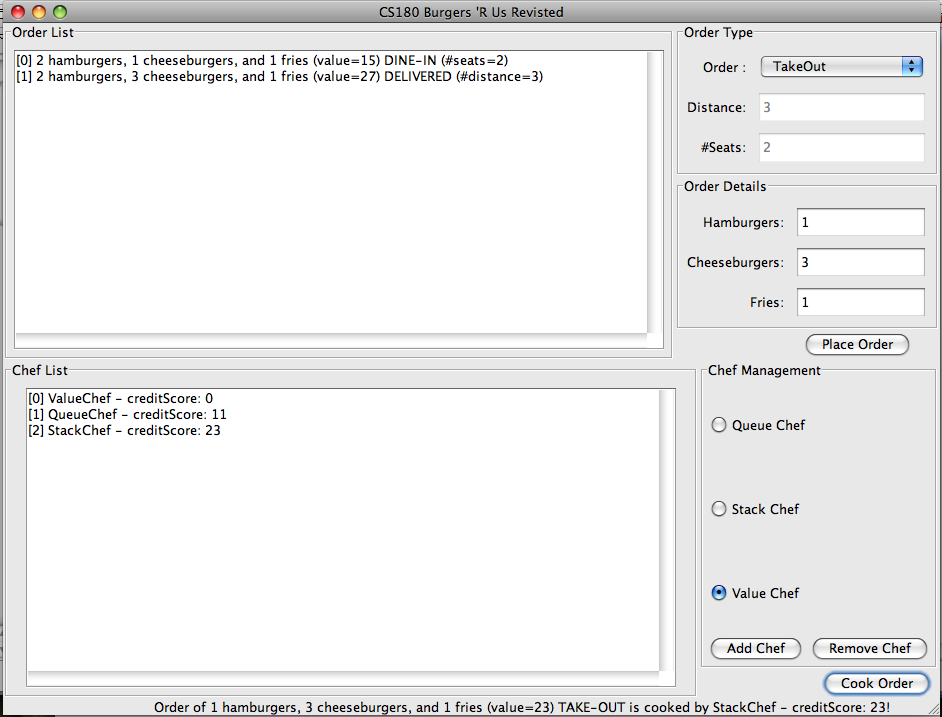
You have been given the skeleton code Project4.java which plays as your main program. You don't have to change anything in this file. Once you implement the above steps correctly, you should be able to see the following GUI: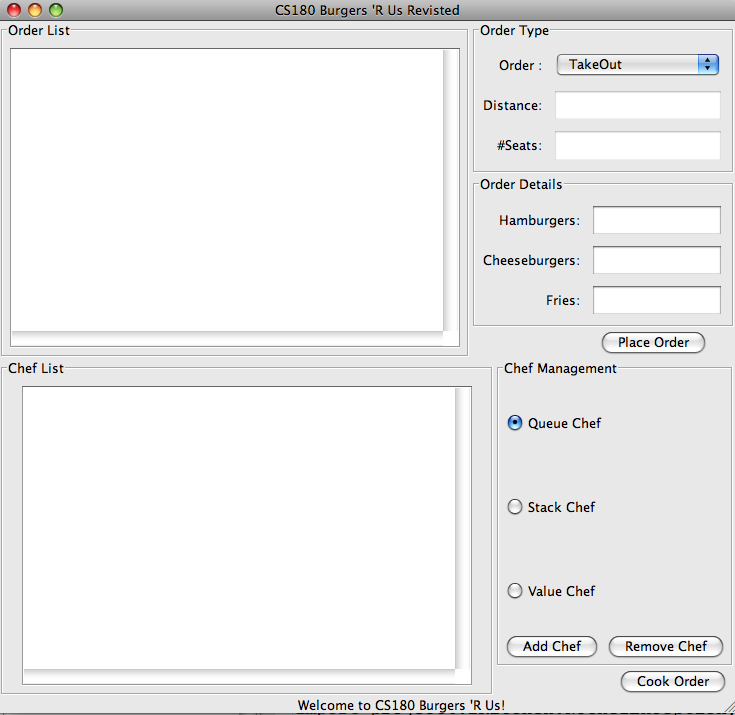
5. Grading rubric
|
Criteria |
Points |
|
Coding Standards (see here) |
5 |
|
Program Compile |
5 |
|
LinkedList class |
30 |
|
Extend Order class |
15 |
|
OrderManager class |
20 |
|
Kitchen class |
20 |
|
Error Handling |
5 |
|
Total |
100 |
6. Turn in instructions
- Change your current folder to your cs180 folder and run
the turnin command:
>> pwd
/home/yourlogin/cs180/project4
>> cd ..
>> pwd
/home/yourlogin/cs180
>> turnin -v -c cs180=XXX -p project4 project4
*XXX is your recitation section number. Check it here if you do not remember.